Seats and engine
Here I am working on one of the seats. All the seats were in perfect condition as far as the springs were concerned except for this seat...one of the springs was busted and had obviously poked through the padding and seat cover at one time. The person who used to drive this car had apparently just coated the broken spring end with some kind of silicone gel and patched the seat. This will require some welding, I suppose.

Here's the back seat...the bottom of it. Yuck-ola! Absolutely full of mouse droppings! After doing this seat, I'm convinced that the person who used to drive this car had the front seats recovered at one time, but not the back seat.


Ok, this is the back seat seat back (Ha ha, I love that!) The seat apparently folds down and makes a big trunk as needed, the back of the seat consists of this particle board covered with rubber.

I removed the seat covers, but didn't know what to do about this rubber-covered particle board. Will the replacement covers supply what I need for this?
This is the seat back with the particle board off of it...there was a nifty little label in there that I think was put there by the person who upholstered the seat originally. It said April 70 on it, which is the month and year the car was built. The padding was in very good condition, but was just FULL of mouse droppings. No way we were keeping it.

Here is the rubber that was in the "storage area" behind the back seat. It was in dreadful condition and the rubber padding under it was completely falling apart. I kept the rubber for future reference, but it will eventually be tossed.

Here's the back seat hardware.

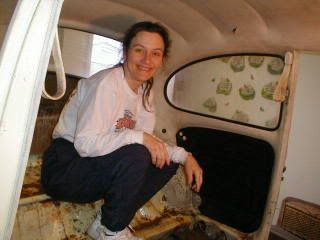
Ok...now...want to see what the inside looks like with no seats? Rosabelle did, so here we are checking it out....

This is what the back part looks like. Whew...it will need a good cleaning and we'll eventually sandblast the whole thing.

After I finally got all the seats hauled back into the shop, I helped Steve for a while as he is still working on getting the engine out...here we are working on getting a piece of tin out that covers the motor...


Here I am with Joshua and a heater channel box!

Matthew took this picture right before we called it a night. My hands were filthy, my hair was falling down and I couldn't fix it! I look a mess!

Hey! I'm working on a CAR, not going to a PROM!


